
Direct answer
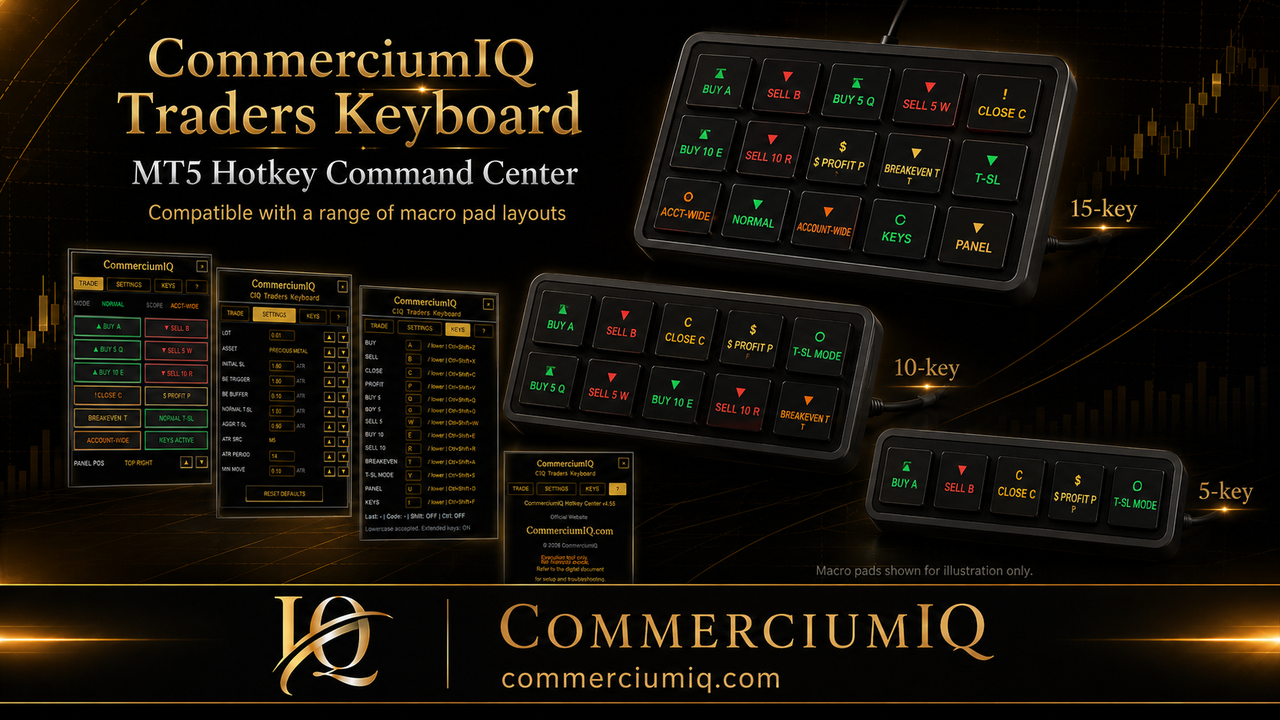
A useful MT5 macro pad label normally follows a simple formula: action first, scope second, mode last. Examples include Buy, Sell, BE + Buffer, Trail Normal, Close Symbol, Close Profit, Panel, and Map.
The label should be short enough to read on the key but complete enough that the trader does not have to remember a hidden meaning.
Use this page for ready-to-use examples
This page focuses on practical command names, compact abbreviations, and example layouts. For the wider labeling system—including spacing, color backup, profile records, and label maintenance—read How to Label a Trading Macro Pad.
Start with the action name
The first word should tell the user what the command does. Entry labels can use Buy and Sell. Protection labels can use BE, BE + Buffer, Trail, or Protect. Close labels should begin with Close so they are visually separated from entry and utility controls.
Avoid labels such as Fast, Safe, Win, Panic, or Magic. Those words describe emotion or expectation rather than the MT5 action.
Add scope to high-impact commands
Scope matters most when a command can change or close an existing position. Close Symbol, Close Profit, and Close All describe different outcomes. A label that says only Close can be too vague when more than one close behavior exists.
If the full wording does not fit, use one documented abbreviation system. For example, Close Sym can mean current symbol only, while Close All should remain fully written because of its wider effect.
Entry-key label examples
Entry keys should be direct and visually separate from position-management keys. Common examples are Buy and Sell. When more than one entry size or mode exists, add only the detail that is truly needed, such as Buy 1, Buy 2, Sell 1, or Sell 2.
Do not use Bull and Bear unless the user has deliberately documented those words. Buy and Sell match the platform action more directly and reduce translation between the label and MT5.
Protection-key label examples
Protection controls should describe the management action rather than imply guaranteed safety. Useful labels may include BE, BE + Buffer, Trail Normal, Trail Aggressive, Trail On, or Trail Off, depending on the actual software behavior.
If two trailing modes exist, the mode name should appear on the label or on an adjacent key map. A single Trail label is not enough when the same device can activate materially different settings.
Close-key label examples
Close controls deserve the clearest wording and the most physical separation. Examples include Close Symbol, Close Profit, Partial Close, and Close All. The label should match the documented command scope exactly.
Account-wide actions should not be shortened into a label that looks similar to a current-symbol action. A wider-scope close key may also need extra spacing, a protective keycap, or a secondary layer.
Utility-key label examples
Utility controls do not open or close exposure, but they still need consistent names. Panel, Keys, Settings, Help, Map, and Toggle are examples. Use the same wording shown in the software panel and documentation.
When a utility key changes state, the on-screen interface should remain the source of truth. A physical label describes the command; it does not prove the current software state.
Example 4-key label set
A compact four-key layout should keep the purpose narrow. One example is Buy, Sell, Close Symbol, and Close Profit. Another protection-focused set is BE + Buffer, Trail Normal, Trail Aggressive, and Panel.
Four keys are not enough for every command. The safer approach is to choose one small workflow rather than force many meanings onto short presses, long presses, and hidden layers.
Example 8-key label set
An eight-key layout can separate actions into two groups. One row may contain Buy, Sell, BE + Buffer, and Trail. A second row may contain Close Symbol, Close Profit, Panel, and Map.
Leave a visible or physical gap between entry and close groups when possible. The label system should help the hand recognize the group before the finger reaches the key.
Example 12-key label set
A twelve-key device can support entry, protection, close, and utility groups without relying on ambiguous abbreviations. The extra space should be used for clearer grouping rather than more dangerous commands.
A possible structure is four entry or size controls, four protection controls, and four close or utility controls. Account-wide actions should still be isolated or placed on a deliberate secondary layer.
Abbreviations that stay understandable
BE is commonly understandable when the documentation also says Breakeven. Sym can represent Symbol when key space is limited. Pft may be less obvious than Profit, so use the full word when it fits.
Do not mix multiple abbreviations for the same idea. If the setup uses Sym, do not use CS on another page or device profile unless both are clearly defined.
Run the cold-read test
After the labels are installed, step away from the setup and return later. Read each key without opening the mapping software. The user should be able to explain the action, scope, and expected after-state in plain language.
If a key needs memory, color alone, or a hidden note to make sense, revise the label before demo testing.
Keep a matching key map
The physical labels, device profile, MT5 mapping, software panel, and support notes should use the same command names. Save the profile name and update date so an older mapping is not mistaken for the active one.
After any remapping, compare every physical key with the on-screen command before the device returns to normal use.
Demo-test each label separately
Test one key at a time on a demo account. Confirm the active symbol, volume, number of open positions, command scope, and after-state. Close and protection commands should be tested with conditions that make their scope visible.
A label is not verified merely because the key produces an action. It is verified when the action matches the label and the documented workflow.
Final command-label checklist
Before live use, confirm that every key names a real command, scope appears where needed, entry and close groups are separated, abbreviations are documented, the device profile matches the labels, and each command has passed a demo test.
The best label is not the shortest possible label. It is the shortest label that remains accurate under pressure.